相对布局中的百分比宽度
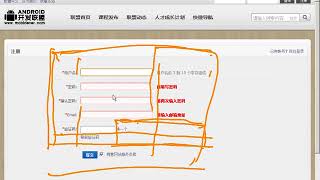
我正在为我的Android应用程序中的登录活动做一个表单布局。下面的图片是我希望它看起来像什么。
在此输入图片描述]1 !
我能够用下面的***XML来实现这个布局。问题是,这有点像黑客。我不得不对主机EditText的宽度进行硬编码。具体来说,我必须指定。
android:layout_width="172dp" 我真的想给主机和端口的EditText一个百分比的宽度。(比如主机80%,端口20%。)这可能吗?下面的XML在我的Droid上有效,但它似乎并不适合所有的屏幕。我真的希望有一个更强大的解决方案。
<!-- begin snippet: js hide: false -->

<RelativeLayout xmlns:android="http://schemas.android.com/apk/res/android"
    android:id="@+id/main"
    android:layout_width="fill_parent"
    android:layout_height="fill_parent" >

    <TextView
        android:id="@+id/host_label"
        android:layout_width="wrap_content"
        android:layout_height="wrap_content"
        android:layout_below="@+id/home"
        android:paddingLeft="15dp"
        android:paddingTop="0dp"
        android:text="host"
        android:textColor="#a5d4e2"
        android:textSize="25sp"
        android:textStyle="normal" />

    <TextView
        android:id="@+id/port_label"
        android:layout_width="wrap_content"
        android:layout_height="wrap_content"
        android:layout_below="@+id/home"
        android:layout_toRightOf="@+id/host_input"
        android:paddingTop="0dp"
        android:text="port"
        android:textColor="#a5d4e2"
        android:textSize="25sp"
        android:textStyle="normal" />

    <EditText
        android:id="@+id/host_input"
        android:layout_width="172dp"
        android:layout_height="wrap_content"
        android:layout_below="@id/host_label"
        android:layout_marginLeft="15dp"
        android:layout_marginRight="15dp"
        android:layout_marginTop="4dp"
        android:background="@android:drawable/editbox_background"
        android:inputType="textEmailAddress" />

    <EditText
        android:id="@+id/port_input"
        android:layout_width="100dp"
        android:layout_height="wrap_content"
        android:layout_below="@id/host_label"
        android:layout_marginTop="4dp"
        android:layout_toRightOf="@id/host_input"
        android:background="@android:drawable/editbox_background"
        android:inputType="number" />

    <TextView
        android:id="@+id/username_label"
        android:layout_width="wrap_content"
        android:layout_height="wrap_content"
        android:layout_below="@+id/host_input"
        android:paddingLeft="15dp"
        android:paddingTop="15dp"
        android:text="username"
        android:textColor="#a5d4e2"
        android:textSize="25sp"
        android:textStyle="normal" />

    <EditText
        android:id="@+id/username_input"
        android:layout_width="fill_parent"
        android:layout_height="wrap_content"
        android:layout_below="@id/username_label"
        android:layout_marginLeft="15dp"
        android:layout_marginRight="15dp"
        android:layout_marginTop="4dp"
        android:background="@android:drawable/editbox_background"
        android:inputType="textEmailAddress" />

    <TextView
        android:id="@+id/password_label"
        android:layout_width="wrap_content"
        android:layout_height="wrap_content"
        android:layout_below="@+id/username_input"
        android:paddingLeft="15dp"
        android:paddingTop="15dp"
        android:text="password"
        android:textColor="#a5d4e2"
        android:textSize="25sp"
        android:textStyle="normal" />

    <EditText
        android:id="@+id/password_input"
        android:layout_width="fill_parent"
        android:layout_height="wrap_content"
        android:layout_below="@id/password_label"
        android:layout_marginLeft="15dp"
        android:layout_marginRight="15dp"
        android:layout_marginTop="4dp"
        android:background="@android:drawable/editbox_background"
        android:inputType="textPassword" />

    <ImageView
        android:id="@+id/home"
        android:layout_width="wrap_content"
        android:layout_height="wrap_content"
        android:layout_alignParentTop="true"
        android:layout_centerHorizontal="true"
        android:layout_centerVertical="false"
        android:paddingLeft="15dp"
        android:paddingRight="15dp"
        android:paddingTop="15dp"
        android:scaleType="fitStart"
        android:src="@drawable/home" />

    <Button
        android:id="@+id/login_button"
        android:layout_width="wrap_content"
        android:layout_height="wrap_content"
        android:layout_below="@+id/password_input"
        android:layout_marginLeft="15dp"
        android:layout_marginTop="15dp"
        android:text="   login   "
        android:textSize="18sp" >
    </Button>

</RelativeLayout>

<!-- end snippet -->


![[EN] 常见问题FAQ 005082 | 面板中颜色旁边的百分比是什么?](https://img.youtube.com/vi/QBDROir7W0U/mqdefault.jpg)


你正在寻找android:layout_weight属性。它将允许你使用百分比来定义你的布局。
在下面的例子中,左边的按钮使用70%的空间,右边的按钮使用30%。
<LinearLayout
    android:layout_width="match_parent"
    android:layout_height="wrap_content"
    android:orientation="horizontal">

    <Button
        android:text="left"
        android:layout_width="0dp"
        android:layout_height="wrap_content"
        android:layout_weight=".70" />

    <Button
        android:text="right"
        android:layout_width="0dp"
        android:layout_height="wrap_content"
        android:layout_weight=".30" />

</LinearLayout>
这对任何一种视图都是一样的,你可以用一些EditText来代替按钮,以满足你的需要。
请确保将layout_width设置为0dp,否则你的视图可能无法正常缩放。
注意,权重之和不一定等于1,我只是觉得这样读起来更容易。你可以把第一个权重设为7,第二个权重设为3,这样会得到同样的结果。
这并不能完全回答原来的问题,原来的问题是针对70/30的分割,但在组件之间50/50分割的特殊情况下,有一个方法。 在中心放置一个隐形的支柱 然后用它来定位两个感兴趣的组件。
<RelativeLayout
    android:layout_width="match_parent"
    android:layout_height="wrap_content">
    <View android:id="@+id/strut"
        android:layout_width="0dp"
        android:layout_height="0dp"
        android:layout_centerHorizontal="true"/>
    <Button
        android:layout_width="0dp"
        android:layout_height="wrap_content"
        android:layout_alignRight="@id/strut"
        android:layout_alignParentLeft="true"
        android:text="Left"/>
    <Button
        android:layout_width="0dp"
        android:layout_height="wrap_content"
        android:layout_alignLeft="@id/strut"
        android:layout_alignParentRight="true"
        android:text="Right"/>
</RelativeLayout>
由于这是一个非常常见的情况,这个解决方案不仅仅是一个好奇心。 它是一个有点黑客,但却是一个高效的黑客,因为空的、零尺寸的支柱应该成本很低。
不过一般来说,最好不要对原厂安卓系统的布局抱有太大的期望...
更新1
正如 @EmJiHash 所指出的 [PercentRelativeLayout][1]在API 26.0.0.0中已被废弃。
下面引用google评论:。
>.这个类在API26.0级中被废弃了。 这个类在API级别26.0.0中被废弃。 考虑使用ConstraintLayout和相关布局来代替。 下面展示了如何用ConstraintLayout复制百分比布局的功能。
谷歌推出了名为的新API [android.support.percent][2]。
然后,你可以通过视图指定百分比来取值
添加编译依赖关系,如
compile 'com.android.support:percent:22.2.0其中,[PercentRelativeLayout][1]就是我们可以做的百分比布局。
 <android.support.percent.PercentRelativeLayout
     xmlns:android="http://schemas.android.com/apk/res/android"
     xmlns:app="http://schemas.android.com/apk/res-auto"
     android:layout_width="match_parent"
     android:layout_height="match_parent">
     <ImageView
         app:layout_widthPercent="50%"
         app:layout_heightPercent="50%"
         app:layout_marginTopPercent="25%"
         app:layout_marginLeftPercent="25%"/>
 </android.support.percent.PercentRelativeLayout>
[1]: https://developer.android.com/reference/android/support/percent/PercentRelativeLayout.html [2]: https://developer.android.com/reference/android/support/percent/package-summary.html
你不能使用百分比来定义RelativeLayout内的View的尺寸。最好的方法是使用LinearLayout和权重,或者一个自定义的Layout。
你可以看看新的百分比支持库。
compile 'com.android.support:percent:22.2.0'[docs][1]
[样本][2]
[1]: https://developer.android.com/reference/android/support/percent/package-summary.html [2]: https://github.com/JulienGenoud/android-percent-support-lib-sample
您可以使用[PercentRelativeLayout][1],它是设计支持库最近增加的一个未记录的功能,使您不仅可以指定元素之间的相对关系,还可以指定可用空间的**总百分比。
>.RelativeLayout RelativeLayout的子类,支持基于百分比的尺寸。
和页边距。 您可以通过使用 >.属性,带有"Percent"。 属性,后缀为"Percent"。 后缀的属性。
<android.support.percent.PercentRelativeLayout
     xmlns:android="http://schemas.android.com/apk/res/android"
     xmlns:app="http://schemas.android.com/apk/res-auto"
     android:layout_width="match_parent"
     android:layout_height="match_parent">
  <ImageView
      android:layout_width="match_parent"
      android:layout_height="match_parent"
      app:layout_widthPercent="50%"
      app:layout_heightPercent="50%"
      app:layout_marginTopPercent="25%"
      app:layout_marginLeftPercent="25%"/>
</android.support.percent.PercentFrameLayout>Percent包提供了个APIs来支持在你的应用中添加和管理基于百分比的维度。
要使用它,你需要将这个库添加到你的Gradle依赖列表中。
dependencies {
    compile 'com.android.support:percent:22.2.0'//23.1.1
}
[1]: https://developer.android.com/reference/android/support/percent/PercentRelativeLayout.html
更新
正如 @EmJiHash 指出的 PercentRelativeLayout 和 PercentFrameLayout。
>.在API 26.0级中已被废弃。 在API 26.0.0中已被废弃。
在API 26.0.0中已被废弃。
考虑使用ConstraintLayout
谷歌推出了名为android.support.percent的新API。
1)PercentRelativeLayout。
2)PercentFrameLayout。
添加编译依赖关系,如
compile 'com.android.support:percent:23.1.1'你可以用百分比来指定维度,这样就可以同时获得 "相对布局 "和百分比的好处。
 <android.support.percent.PercentRelativeLayout
         xmlns:android="http://schemas.android.com/apk/res/android"
         xmlns:app="http://schemas.android.com/apk/res-auto"
         android:layout_width="match_parent"
         android:layout_height="match_parent"/>
     <TextView
         app:layout_widthPercent="40%"
         app:layout_heightPercent="40%"
         app:layout_marginTopPercent="15%"
         app:layout_marginLeftPercent="15%"/>
</android.support.percent.PercentRelativeLayout/>我已经解决了这个问题,创建了一个自定义视图。
public class FractionalSizeView extends View {
  public FractionalSizeView(Context context, AttributeSet attrs) {
    super(context, attrs);
  }

  public FractionalSizeView(Context context, AttributeSet attrs, int defStyle) {
    super(context, attrs, defStyle);
  }

  @Override
  protected void onMeasure(int widthMeasureSpec, int heightMeasureSpec) {
    int width = MeasureSpec.getSize(widthMeasureSpec);
    setMeasuredDimension(width * 70 / 100, 0);
  }
}
这是一个不可见的支柱,我可以用它来对齐RelativeLayout中的其他视图。
由于PercentRelativeLayout在26.0.0中已经被废弃,而且像RelativeLayout里面的LinearLayout这样的嵌套布局对性能有负面影响(理解ConstraintLayout的性能优势),你实现百分比宽度的最佳选择是用ConstraintLayout替换你的RelativeLayout。
这可以通过两种方式来解决。
解决方案#1 使用百分比偏移的准则。
[![版面设计编辑][1]][1]
<android.support.constraint.ConstraintLayout
    xmlns:android="http://schemas.android.com/apk/res/android"
    xmlns:app="http://schemas.android.com/apk/res-auto"
    android:layout_width="match_parent"
    android:layout_height="match_parent">

    <TextView
        android:id="@+id/host_label"
        android:layout_width="wrap_content"
        android:layout_height="wrap_content"
        android:text="Host"
        android:layout_marginTop="16dp"
        android:layout_marginLeft="8dp"
        app:layout_constraintTop_toTopOf="parent"
        app:layout_constraintLeft_toLeftOf="@+id/host_input" />

    <TextView
        android:id="@+id/port_label"
        android:layout_width="wrap_content"
        android:layout_height="wrap_content"
        android:text="Port"
        android:layout_marginTop="16dp"
        android:layout_marginLeft="8dp"
        app:layout_constraintTop_toTopOf="parent"
        app:layout_constraintLeft_toLeftOf="@+id/port_input" />

    <EditText
        android:id="@+id/host_input"
        android:layout_width="0dp"
        android:layout_height="wrap_content"
        android:layout_marginTop="8dp"
        android:layout_marginLeft="8dp"
        android:layout_marginRight="8dp"
        android:inputType="textEmailAddress"
        app:layout_constraintTop_toBottomOf="@+id/host_label"
        app:layout_constraintLeft_toLeftOf="parent"
        app:layout_constraintRight_toLeftOf="@+id/guideline" />

    <EditText
        android:id="@+id/port_input"
        android:layout_width="0dp"
        android:layout_height="wrap_content"
        android:layout_marginTop="8dp"
        android:layout_marginLeft="8dp"
        android:layout_marginRight="8dp"
        android:inputType="number"
        app:layout_constraintTop_toBottomOf="@+id/port_label"
        app:layout_constraintLeft_toLeftOf="@+id/guideline"
        app:layout_constraintRight_toRightOf="parent" />

    <android.support.constraint.Guideline
        android:id="@+id/guideline"
        android:layout_width="wrap_content"
        android:layout_height="wrap_content"
        android:orientation="vertical"
        app:layout_constraintGuide_percent="0.8" />

</android.support.constraint.ConstraintLayout>
解法#2 在EditText中使用加权宽度的链。
[![版面设计编辑][2]][2]
<android.support.constraint.ConstraintLayout
    xmlns:android="http://schemas.android.com/apk/res/android"
    xmlns:app="http://schemas.android.com/apk/res-auto"
    android:layout_width="match_parent"
    android:layout_height="match_parent">

    <TextView
        android:id="@+id/host_label"
        android:layout_width="wrap_content"
        android:layout_height="wrap_content"
        android:text="Host"
        android:layout_marginTop="16dp"
        android:layout_marginLeft="8dp"
        app:layout_constraintTop_toTopOf="parent"
        app:layout_constraintLeft_toLeftOf="@+id/host_input" />

    <TextView
        android:id="@+id/port_label"
        android:layout_width="wrap_content"
        android:layout_height="wrap_content"
        android:text="Port"
        android:layout_marginTop="16dp"
        android:layout_marginLeft="8dp"
        app:layout_constraintTop_toTopOf="parent"
        app:layout_constraintLeft_toLeftOf="@+id/port_input" />

    <EditText
        android:id="@+id/host_input"
        android:layout_width="0dp"
        android:layout_height="wrap_content"
        android:layout_marginTop="8dp"
        android:layout_marginLeft="8dp"
        android:layout_marginRight="8dp"
        android:inputType="textEmailAddress"
        app:layout_constraintHorizontal_weight="0.8"
        app:layout_constraintTop_toBottomOf="@+id/host_label"
        app:layout_constraintLeft_toLeftOf="parent"
        app:layout_constraintRight_toLeftOf="@+id/port_input" />

    <EditText
        android:id="@+id/port_input"
        android:layout_width="0dp"
        android:layout_height="wrap_content"
        android:layout_marginTop="8dp"
        android:layout_marginLeft="8dp"
        android:layout_marginRight="8dp"
        android:inputType="number"
        app:layout_constraintHorizontal_weight="0.2"
        app:layout_constraintTop_toBottomOf="@+id/port_label"
        app:layout_constraintLeft_toRightOf="@+id/host_input"
        app:layout_constraintRight_toRightOf="parent" />

</android.support.constraint.ConstraintLayout>
在这两种情况下,你会得到这样的东西
[![结果查看][3]][3]
[1]: https://i.stack.imgur.com/NrJPA.png [2]: https://i.stack.imgur.com/FrjAI.png [3]: https://i.stack.imgur.com/RErO7.png
从支持库的26.0.0版本开始,[PercentRelativeLayout][1]被废弃。
**Google 引入了名为 [ConstraintLayout][2] 的新 Layout。
在你的模块级build.gradle文件中添加该库作为依赖关系。
     dependencies {
        compile 'com.android.support.constraint:constraint-layout:1.0.1'
      }
在布局文件中添加即可。
<?xml version="1.0" encoding="utf-8"?>
<android.support.constraint.ConstraintLayout
    xmlns:android="http://schemas.android.com/apk/res/android"
    xmlns:app="http://schemas.android.com/apk/res-auto"
    android:layout_width="match_parent"
    android:layout_height="match_parent">
</android.support.constraint.ConstraintLayout>
制约因素
约束帮助您保持小组件对齐。 您可以使用锚点,如下面所示的约束句柄,来确定不同小组件之间的对齐规则。
[![][3]][3]
Wrap Content。 视图根据需要展开以适应其内容。-
匹配约束条件。 视图根据需要展开,以满足其约束条件的定义,并考虑到边距。 但是,如果给定的维度只有一个约束,那么视图将展开以适应其内容。 在高度或宽度上使用该模式还可以设置大小比例。 -
固定。 您可以在下面的文本框中指定一个特定的尺寸,或者在编辑器中调整视图的大小。 -
分散:你可以在下面的文本框中指定具体的尺寸,或者在编辑器中调整视图的大小。 视图均匀分布(考虑到边距后)。 这是默认的。 -
Spread inside。 第一个和最后一个视图贴在链两端的约束上,其余视图均匀分布。 -
加权。 当链子设置为spread或spread inside时,可以将一个或多个视图设置为"匹配约束",来填充剩余的空间。 (0dp)。 默认情况下,空间在每个设置为"匹配约束的视图之间均匀分布,"。 但你可以使用layout_constraintHorizontal_weight和layout_constraintVertical_weight属性为每个视图分配一个重要性的权重。 如果你熟悉线性布局中的layout_weight,这也是同样的工作方式。 因此,权重值最高的视图会获得最多的空间。 具有相同权重的视图获得相同的空间量。Packed。 视图被打包在一起(考虑到边距后)。 然后你可以通过改变链的头部视图偏向来调整整个链的偏向(左/右或上/下)。 -
水平居中或垂直居中。 要快速创建一个视图链,请选中所有视图,右击其中一个视图,然后选择水平居中或垂直居中,以创建一个水平或垂直的链。 -
"基线对齐"。 将一个视图的文本基线与另一个视图的文本基线对齐。
-
"约束到一个准则"。 你可以添加一条垂直或水平的导线,你可以将视图约束在该导线上,该导线将对应用用户不可见。 你可以根据dp单位或百分比,相对于布局'的边缘,在布局中定位该准则。
-
调整约束的偏向。 当你将约束添加到视图的两边时(且同一维度的视图尺寸要么是"固定" 或"wrap content"),视图会以50%的默认偏差居中于两个约束之间。 您可以在 "属性 "窗口中拖动偏置滑块来调整偏置。 -
"将尺寸设置为比例"。 如果至少有一个视图尺寸设置为"match constraints",您可以将视图尺寸设置为16:9等比例。 (0dp)的情况下,您可以将视图尺寸设置为16:9这样的比例。
你可以从官方的[doc][4]中了解更多。
[![][5]][5]
[1]: https://developer.android.com/reference/android/support/percent/PercentRelativeLayout.html [2]: https://developer.android.com/reference/android/support/constraint/ConstraintLayout.html [3]: [3]:https://i.stack.imgur.com/9bqp8.png [4]: https://developer.android.com/training/constraint-layout/index.html [5]: https://i.stack.imgur.com/XfkJK.png
只要把你的两个文本视图主机和端口放在一个独立的水平线性布局中,并使用android:layout_weight来制作百分比。
你可以通过布局权重来实现这一点。 权重决定了屏幕上未被占用的部分是如何划分的。 给每个EditText的layout_width为0,并给一些相应的权重。 例如,如果你想让一个编辑文本占用两倍的空间,就给它一个权重为2,另一个权重为1。
有趣的是,在 @olefevre 的回答基础上,我们不仅可以用 "隐形支柱"做 50/50 布局,还可以做各种涉及到 2 的幂的布局。
例如,以下是一个将宽度切割成四个等份的布局(实际上是三个,权重为 1、1、2)。
<?xml version="1.0" encoding="utf-8"?>
<RelativeLayout xmlns:android="http://schemas.android.com/apk/res/android"
    android:layout_width="match_parent"
    android:layout_height="wrap_content" >

    <View
        android:id="@+id/strut"
        android:layout_width="1dp"
        android:layout_height="match_parent"
        android:layout_centerHorizontal="true"
        android:background="#000000" />

    <RelativeLayout
        android:layout_width="match_parent"
        android:layout_height="wrap_content"
        android:layout_toLeftOf="@+id/strut" >

        <View
            android:id="@+id/left_strut"
            android:layout_width="1dp"
            android:layout_height="match_parent"
            android:layout_toLeftOf="@+id/strut"
            android:layout_centerHorizontal="true"
            android:background="#000000" />

        <Button
            android:layout_width="0dp"
            android:layout_height="wrap_content"
            android:layout_alignParentLeft="true"
            android:layout_alignRight="@+id/left_strut"
            android:text="Far Left" />

        <Button
            android:layout_width="0dp"
            android:layout_height="wrap_content"
            android:layout_alignParentRight="true"
            android:layout_toRightOf="@+id/left_strut"
            android:text="Near Left" />
    </RelativeLayout>

        <Button
            android:layout_width="0dp"
            android:layout_height="wrap_content"
            android:layout_alignLeft="@id/strut"
            android:layout_alignParentRight="true"
            android:text="Right" />

</RelativeLayout>